During my childhood, I have always imagined rowing along a river on a raft like Tom Sawyer and always wanted to build a raft. But somehow I ended up building a wooden rowboat and I even built a shallow water tunnel hull boat but never raft.
So this time it has to be a raft. I started thinking of how I would use the raft so the first thing I did was defined the raft’s specification.
The raft has to be
1. Low cost.
2. Light.
3. Easily trailer-able.
4. Stable for stand-up casting.
5. Comfortable.
6. Easy to build from easily available materials.
7. Carry a minimum of 2 adults.
8. Rivers and lakes capable.
9. Handles engine of at least 5HP.
10. Can be launched and retrieved by one person.
11. It has to look good
With the specification out of the way, the next thing would be to select the means of floatation. Should I use bamboo? Tire tubes? Plastic drums? Drums would be awkward to roll on and off a trailer. Bamboo will not last. In the end, I settle on PVC pipes as it comes in many sizes and is relatively low costs.
PVC pipes comes in fixed length of 6 meter each so I made some flotation calculation to determine which diameter of the pipes to use and how many lengths.
I want the PVC pipes to float at least half above water level with a load of 2 adults, engines, fishing gear, etc. It worked out to be 3 full-length 6 meter of 250 cm diameter PVC pipes.
After finishing the design, I purchased the following PVC pipes and the rest of the materials.
Tools & Material
The material you would need to build this raft are:
1. 3-length of 250mm (10”) PVC Pipe
2. Epoxy glue
3. Fiberglass material and resins.
4. 18 meter of wood 5cm x 5 cm (2”x2’) (for the frames)
5. 9 meter of wood 10cm x 168 cm x 2 cm (for the braces)
6. 3.5 meter of wood 19cm high x 2cm thick (for the transom)
7. 10m of wood 10cm x 2cm x 280cm (for floor)
8. Bolts
9. Screws
The tools needed to build this raft would be:
1. Circular saw
2. Jigsaw
3. Drill
4. Hammer
5. Hacksaw
6. Knife
7. Screwdriver
8. Spanner
9. Tape measure
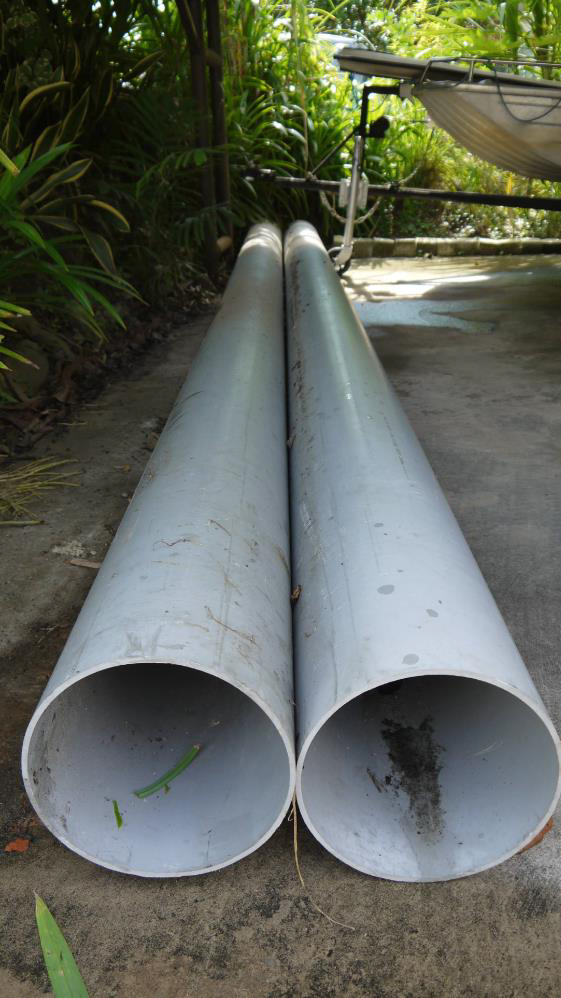
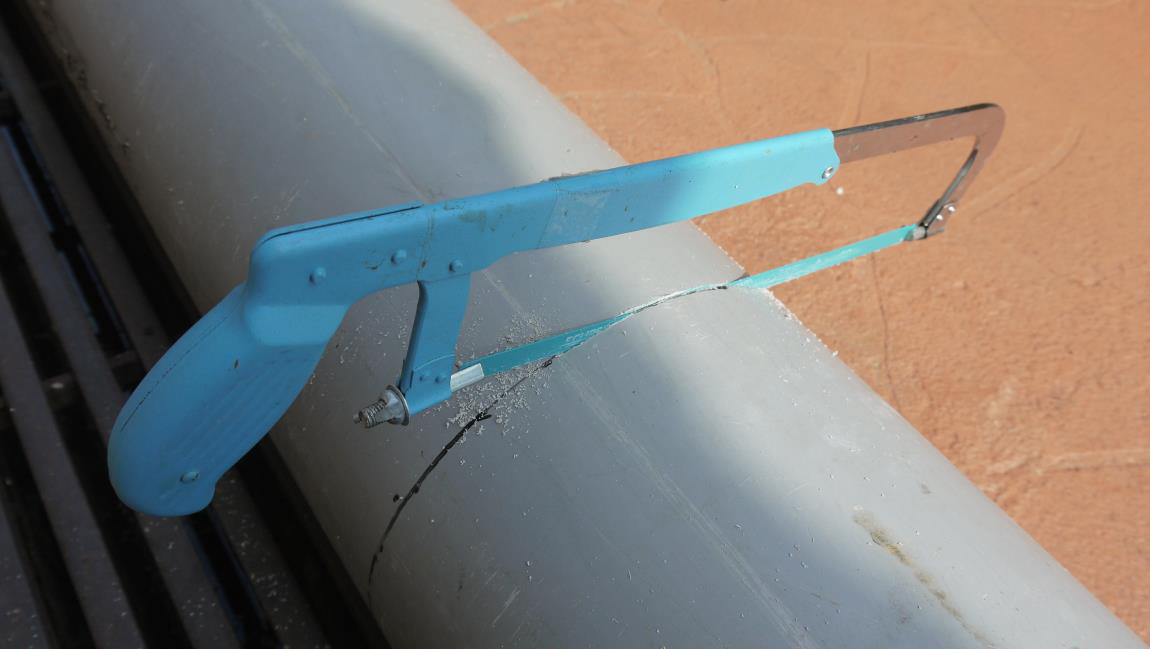
The PVC pipes comes in 6-meter length (Photo 2) so the first thing to do is to cut it into halves of 3 meter length. This is easily done with a tape measure and a hack saw. Measure the actual length of the pipe and divide it by two. This would be the mid-point. Mark this mid-point with a marker pen. Mark the mid-point with a dot. Repeat this while circling the pipe. Join these dots together to form a line going around the pipe at the mid-point. Cut along this line with your hacksaw. Do this for all three pipes and you would have 6 pcs of 3 meter pipes. (See Photo 3).
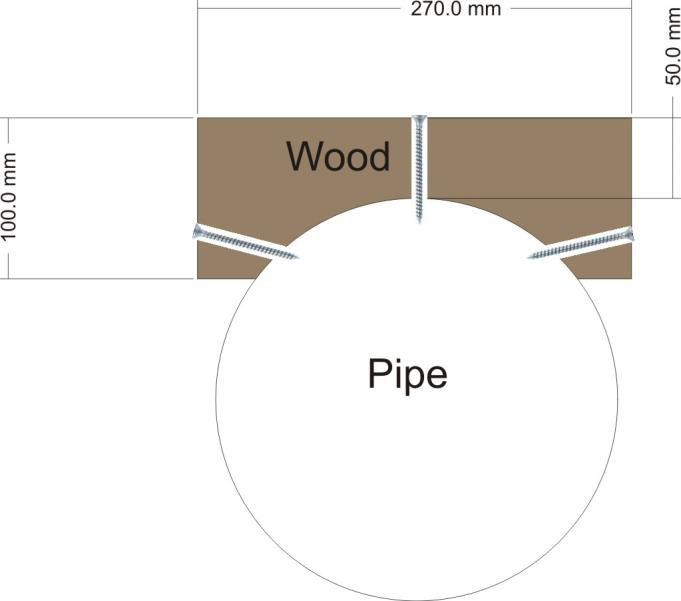
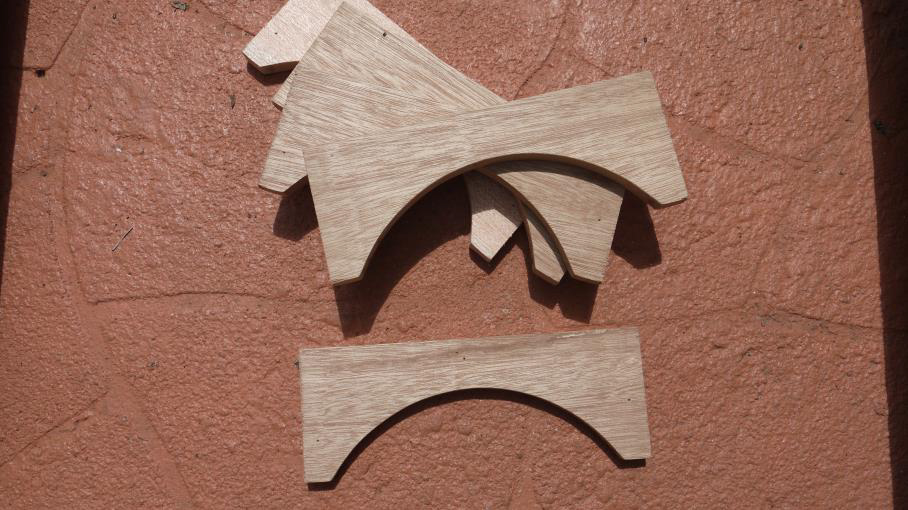
The next thing to do is to make the braces to attach to the pipes. Do this by first making a template of the curves of the pipe with a piece of cardboard. Use a fine marker pen to draw along the edges of the pipe onto the cardboard copy its curves to make a template (see figure 1). With the template, mark the wood and cut out the shape of the braces (see Photo 4). You would need 5 braces for each pipe so in total you would need to cut out 30 pieces of wooden braces.
We would need to seal the front and back of the pipe to make it air-tight and waterproof. One way is to buy PVC end-caps to cap both ends but end caps for 250mm PVC pipes are not readily available. Plus, I prefer the raft to have a pointed front to cut through water. I have also experimented heating the PVC pipe to shape the pipe to have a pointed end. Heating small diameter pipes to shape it is easy but with 250mm pipe it is a different story. It was hard work but I did manage to shape it. The esthetic was not very appealing so I abandoned that technique. Instead I went back to one of my favorite material which is fiberglass. Fiberglass is easy to work with and is very strong.
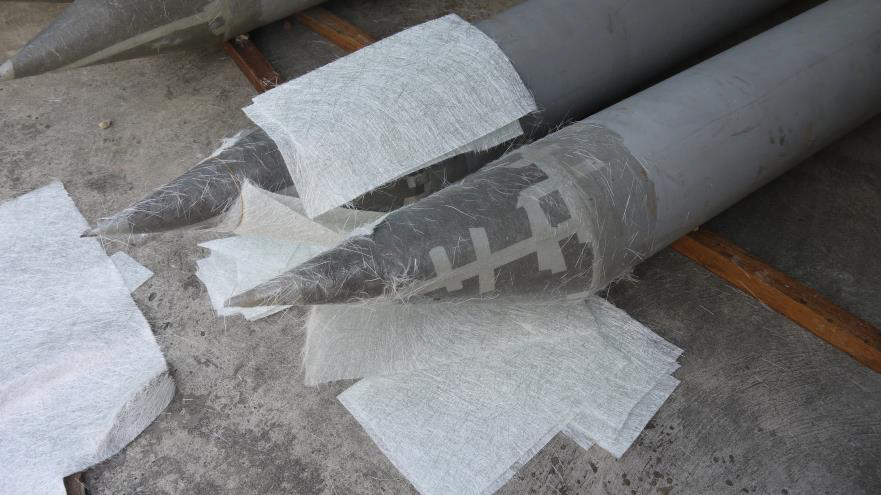
I bought 6 pcs of large size (A1) cardboard. Fold it into a cone shape. Place it over the front open end of the pipe. Angle it so that the pointed end is at the top. Cut off the extra edges. Tape it to the pipe with masking tape. Repeat this for the remaining pipes. Cut pieces of the fiberglass mat, place it over the cone and spread the resin over it. Repeat this until you have covered all the cone and overlap it onto the PVC pipe (See photo 5). My suggestion is to do at least a minimum 3 layers of fiberglass. More layers mean more strength but more weight.

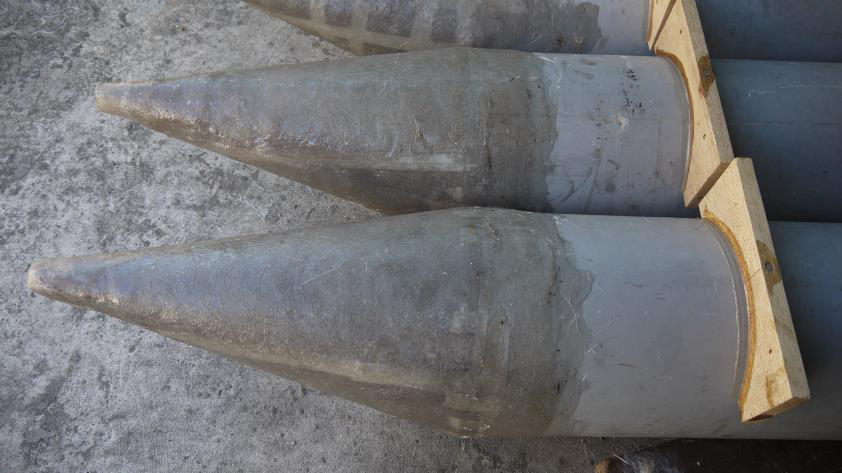
To cover the back end of the pipes, again, cardboard was used. Cut a piece of cardboard to cover the end. I would then put three layers of fiberglass over it (See photo 6).
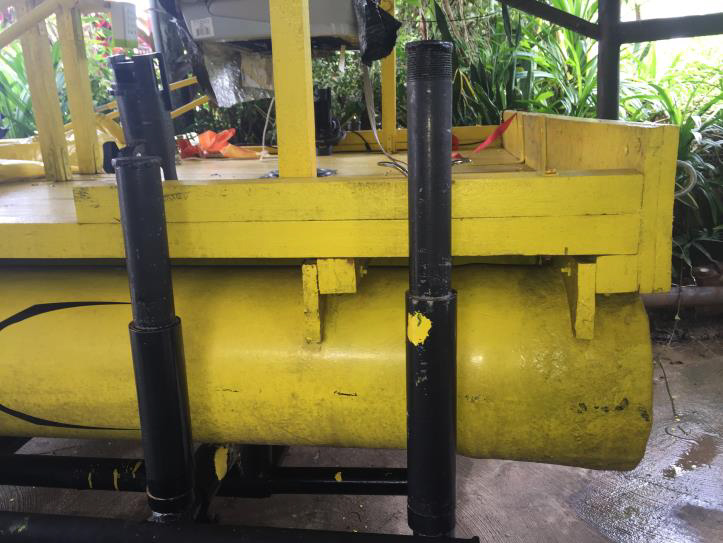
With the fiberglass work completed, the next thing to do is install the braces. I drilled 3 holes on each brace and screw it to the pipe with stainless steel screw through each of the 3 holes to secure it to the pipe (See figure 1). You would need to epoxy glue to strengthen and waterproof the joint. Apply it evenly throughout the area in which the wood braces contact the pipe (see photo 7).
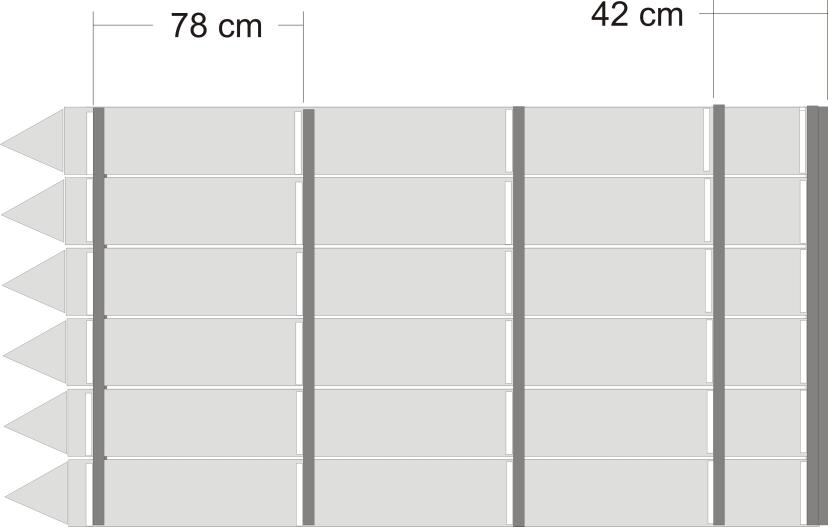
After completing the installation of the braces, it is time to join the 6 pipes together by joining it to the braces with 5cm x 5cm (2×2) length of woods. Measure the total width of the 6 pipes together (168 cm). Cut 5 pcs of 5cm x 5cm (2×2) wood. Install 2 screws per brace to the 2×2 wood evenly (see figure 2).
(2×2) was added to strengthen the transom.
Before putting on the floor boards, we must first complete the transom. Cut a piece of plank 168cm wide x 19cm high x 3.5cm thick). If you have trouble finding a plank of that thickness, you could join 2 pcs of planks (168cm long x19cm high x 1.75cm thick) instead. Screw them onto the last 5cm x 5cm (2×2) braces joint (See photo 8).
The next thing is to install the floor boards. Cut planks with length 268cm of 1.75cm thickness to make the floor of the raft. Complete the flooring with 5cm x5cm (2×2) framing the floor around its edges.
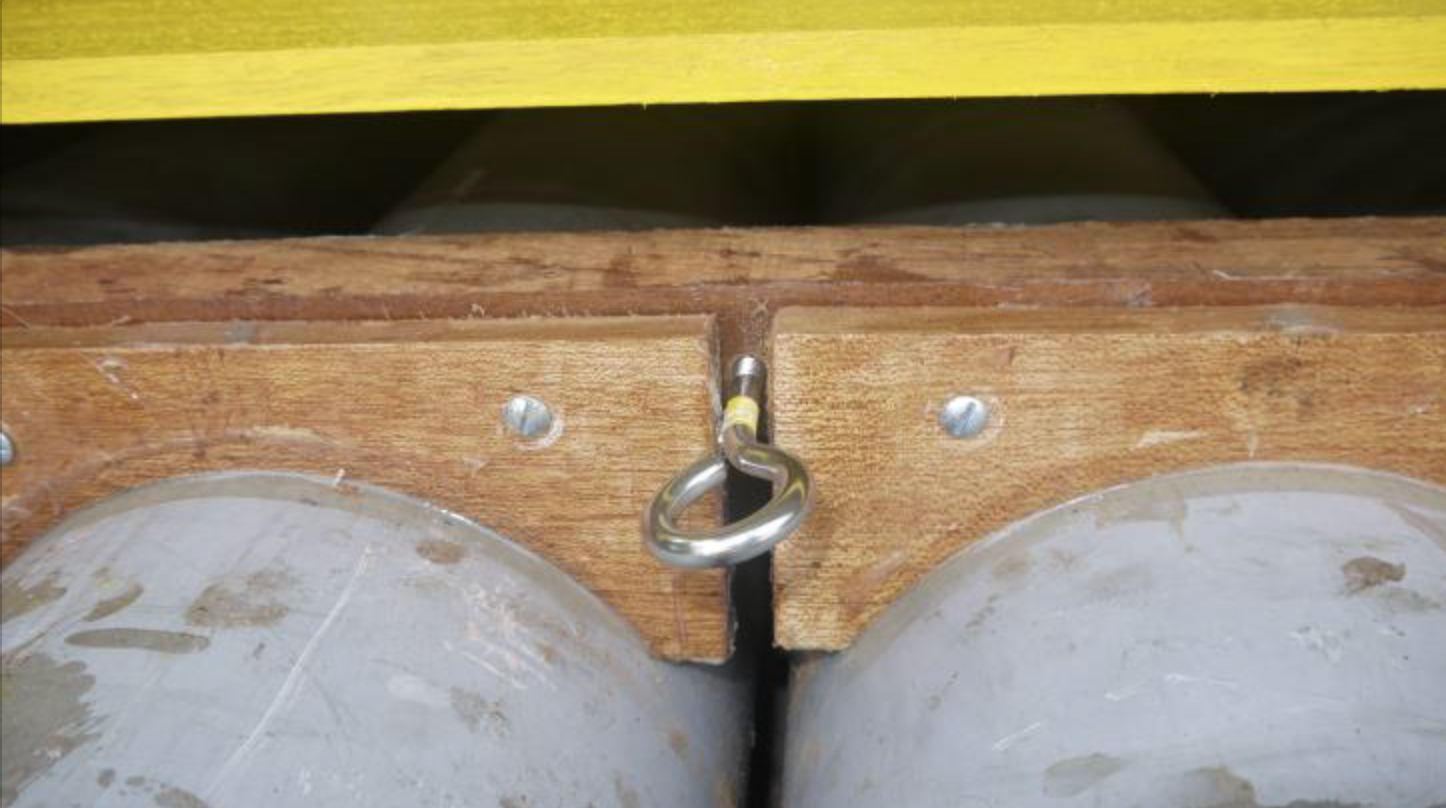
Install the towing hook in front of the boat by attaching it to the 5cm x 5cm (2×2) frame (see photo 9).
To strengthen the transom after you have finished installing the floor boards, install a length of 5cm x 5 cm (2×2) on the edge of the boat to the transom.
Paint the boat to the color of your choice and perhaps decorate the boat with custom stickers.
With that, the raft is basically complete and ready for the water. But of course, it would be better to put in seats, fish finders, rod holders, etc. and make your raft into a serious fishing machine.
You can reach me at captfred@fredfishing.com if you have any questions about this project.